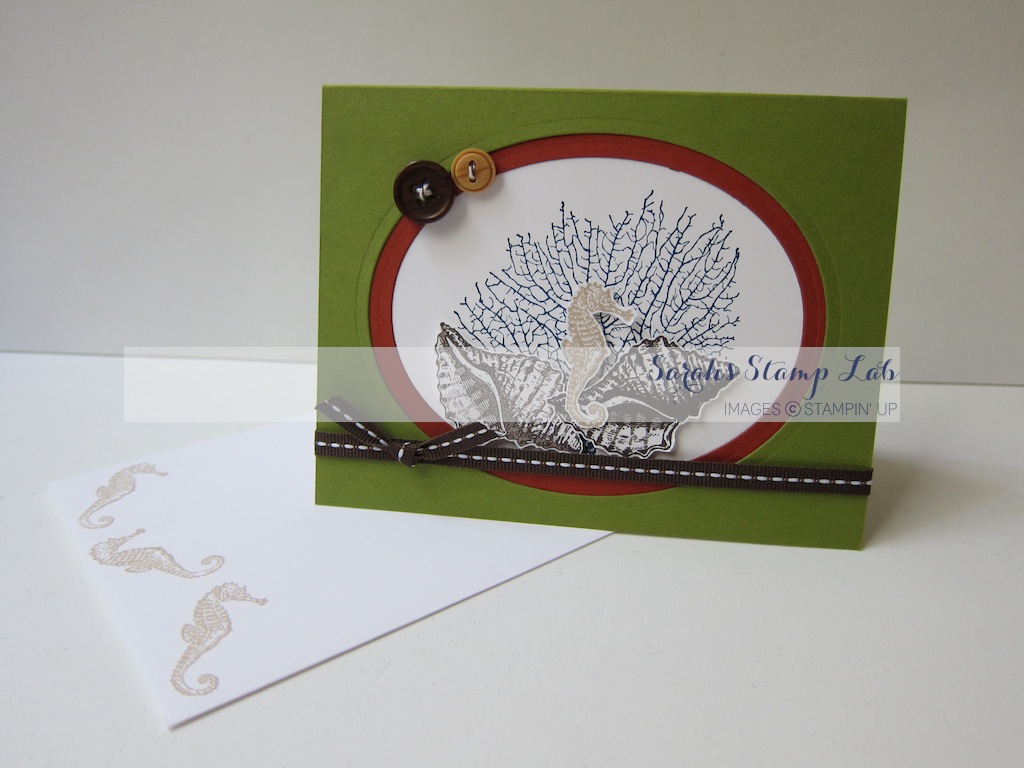
Thursday, October 31, 2013

Halloween Thinlits Card

Hi Stampers!

Happy Halloween!!!!

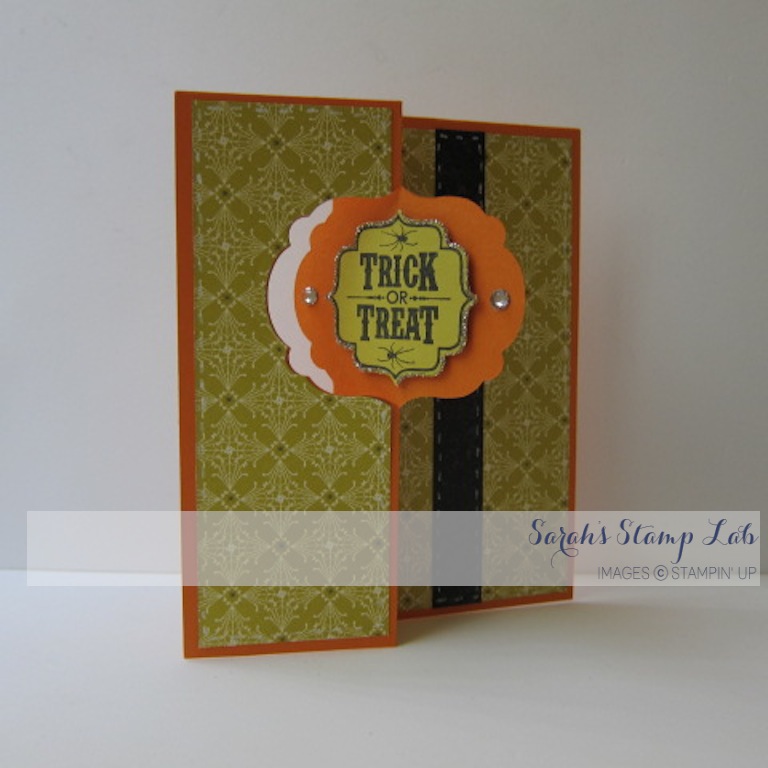
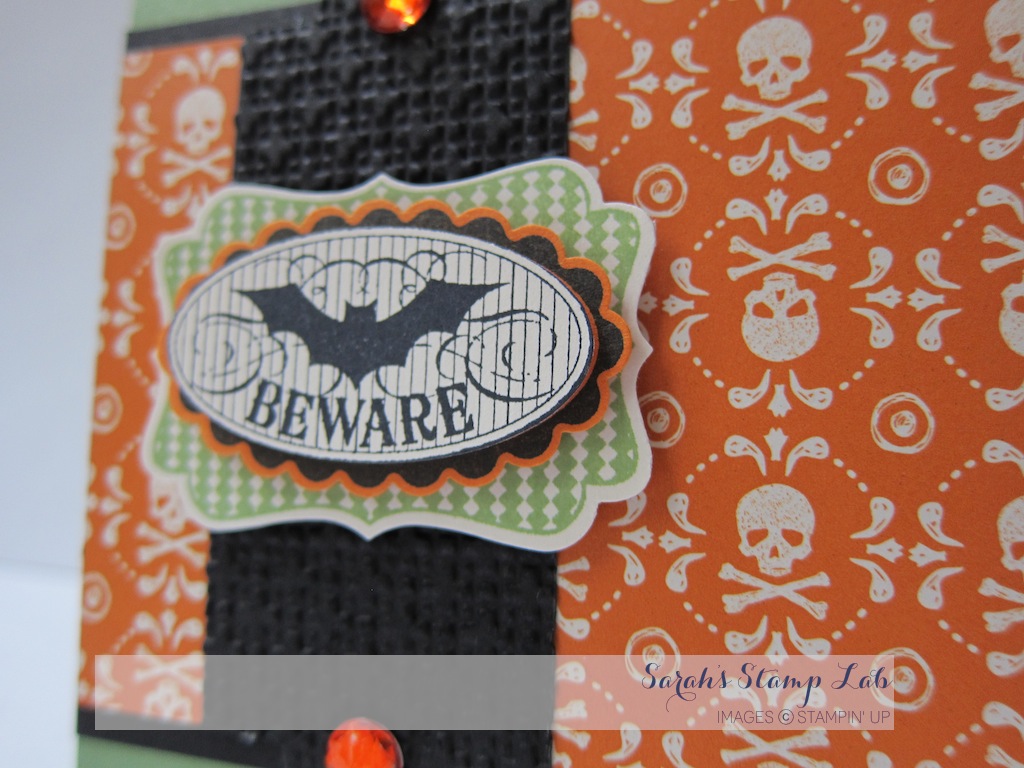
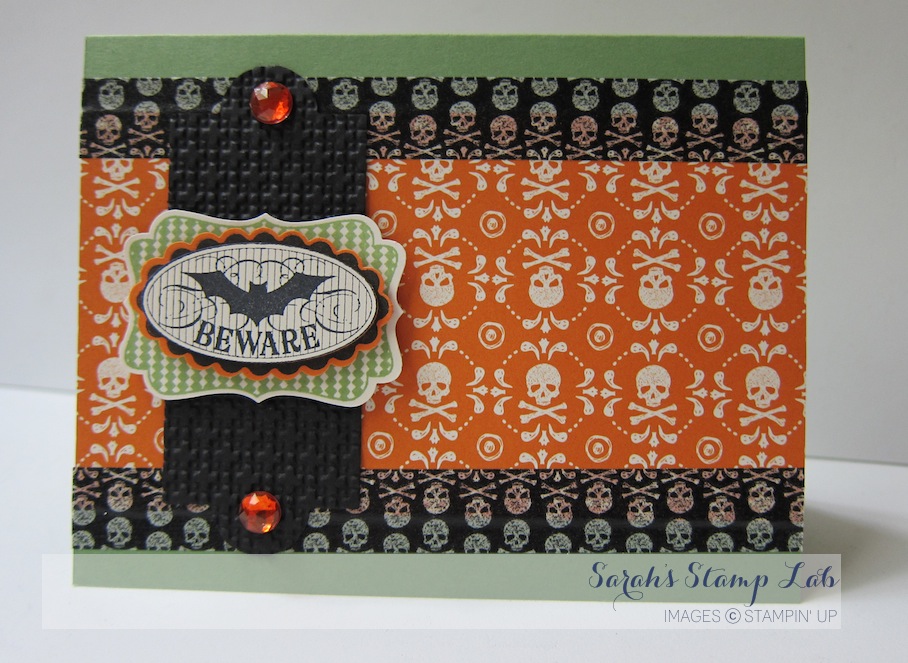
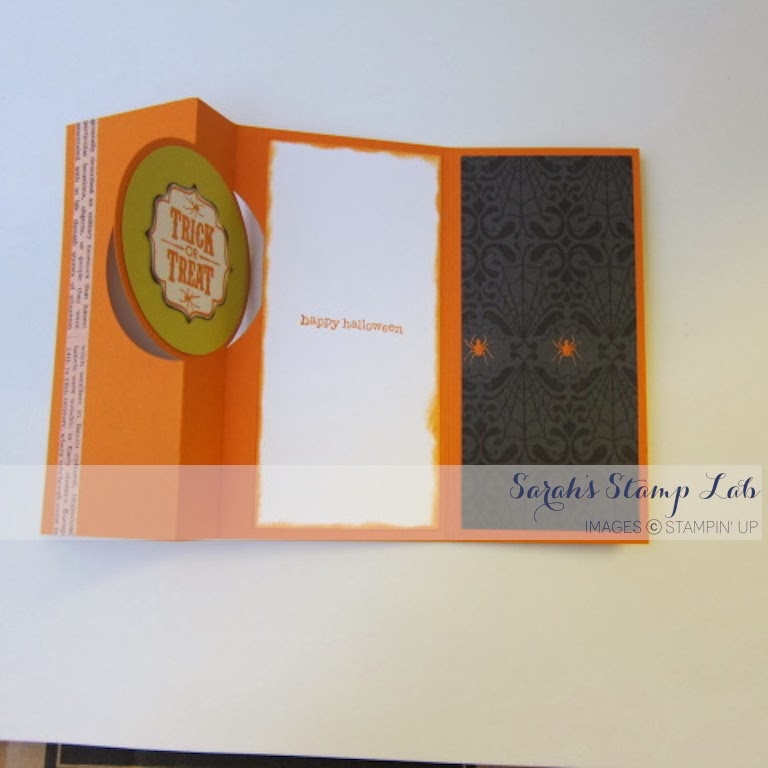
Today I have one more Halloween card to share with you.  It's another interactive card that I made with the new Thinlits dies.  Today I'm featuring the circle thinlit die.


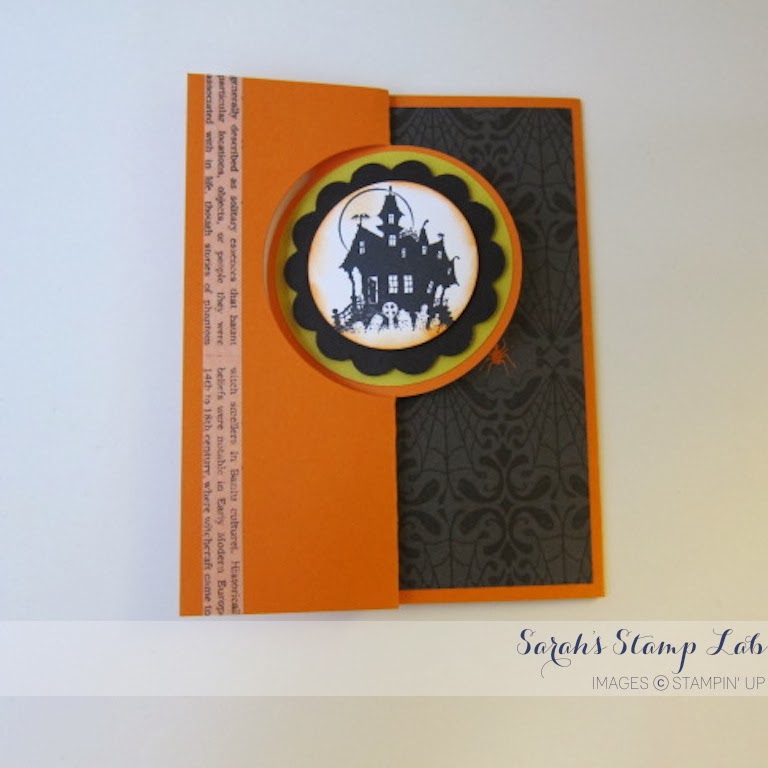
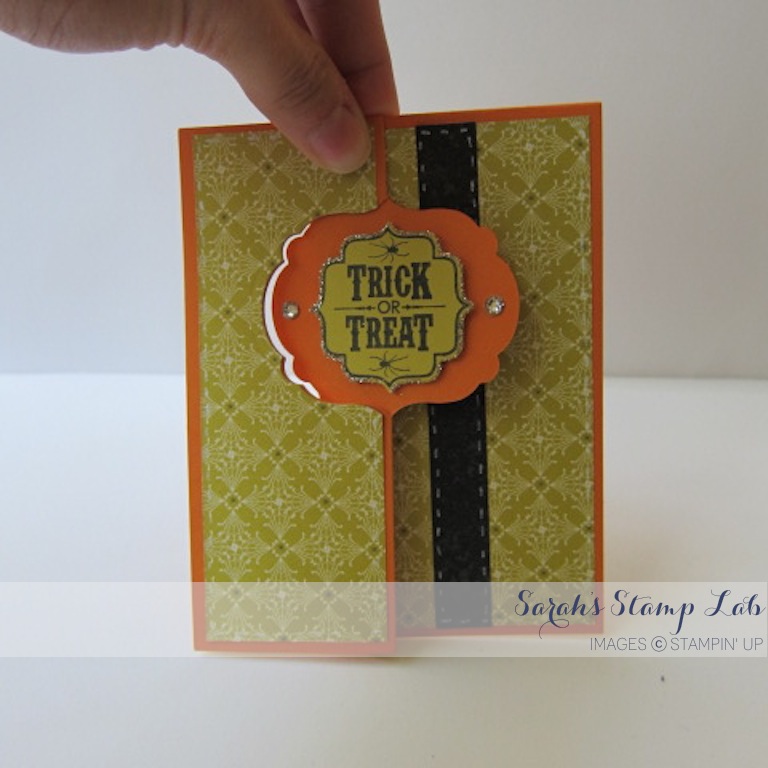
Here you can the movable part of the card. Isn't that fun?  You can decorate both sides of the movable circle label.  I also did a little trick to add an extra panel on the card.  This allows you to have a larger card interior space to write on.

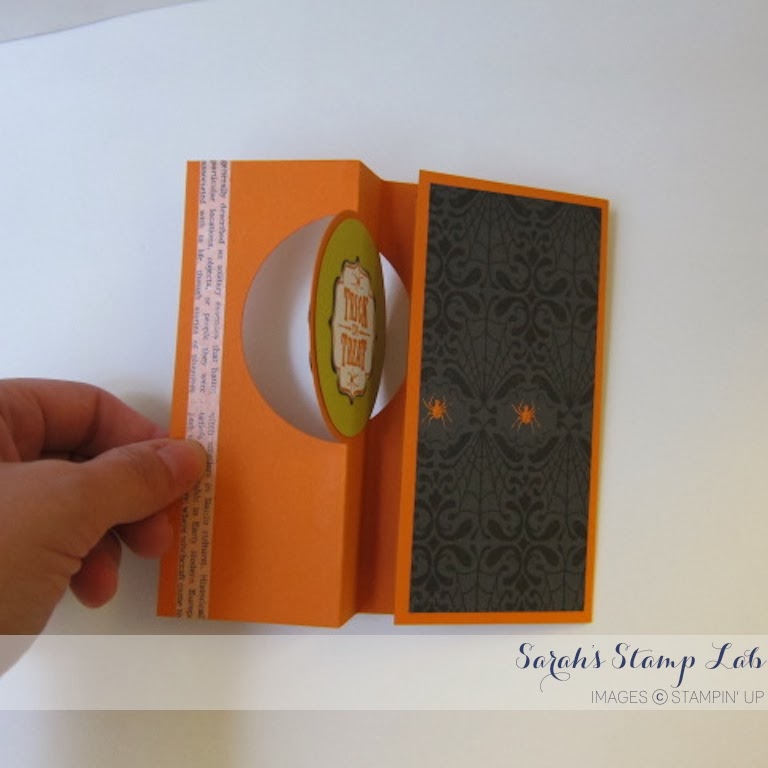
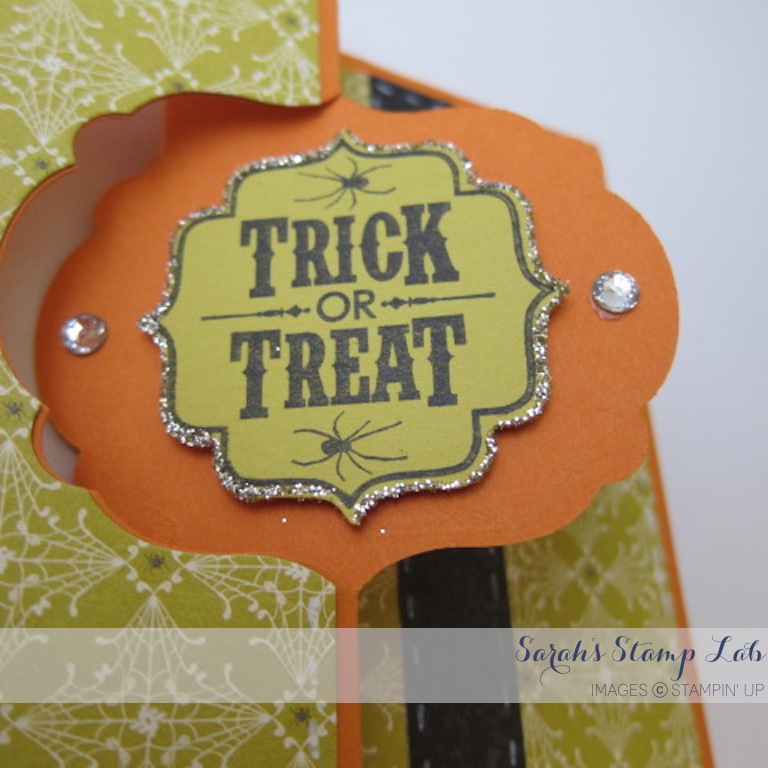
Here's a closer look at the way I decorated the other side of the circle panel.  The 2-1/2" circle punch is the perfect size to make a mat on this panel of the card.


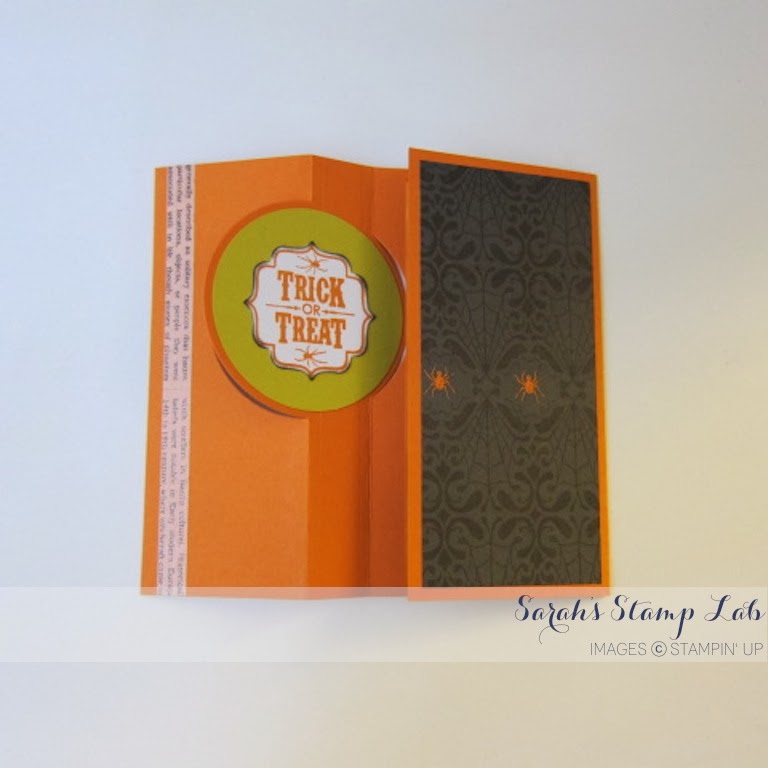
Here's a peek at the card when it is fully open.  See how the extra panel gives you more room on the interior to write a message? 


Stampin' Supplies:
Card Stock: Whisper White, Pumpkin Pie, Basic Black, Summer Starfruit
Designer Series Paper: Witch's Brew
Stamps: Best of Halloween, Tags 4 You, Teeny Tiny Wishes
Ink: JetBlack StazOn, Pumpkin Pie
Punches: Bracket Label, 1-3/4" Circle, 2" Scallop Circle, 2-1/2" Circle
Embellishments: Witch's Brew Designer Washi Tape

Tuesday, October 29, 2013

Another Halloween Swap

Hi Stampers!

It's Tuesday and that means the new weekly deals have been announced!  Click HERE to see what's on sale!

Today I have another Halloween card for you!  This is one that I made for a swap.  It's so easy to create with Stampin' Up!'s punches!  This card also doesn't have too many layers, making it a great one to send in
the mail!


Stampin' Supplies:
Card Stock: Basic Black, Whisper White, Pumpkin Pie, Old Olive Textured
Stamps: Halloween Hello, Teeny Tiny Wishes
Ink: Jet Black StazOn, White StazOn, Pumpkin Pie
Punches: 1" Square, Postage Stamp
Embellishments: Witch's Brew Designer Washi Tape, Brights Candy Dots and brads

Monday, October 28, 2013

Thinlits Halloween Card

Hi Stampers!

It's Halloween Week and I have some fun Halloween cards to share with you!  Today's card features the new Thinlit dies from Stampin' Up! These dies allow you to create fun, interactive, moveable cards.  The die does all the work for you.  All you need to do is crease the score marks and decorate!  Super easy.


I had to pinch the card closed so you can see the whole front.  The black strip is a scrap of the Witch's Brew DSP.  I used the White Chalk Marker to add some faux stitching to the piece to make it a little more interesting.

For the label panel, I used the Tags 4 You stamp set featured in the Holiday Catalog.  It coordinates perfectly with the new Bracket label punch.  Then I used the new silver glitter and some Basic Rhinestone Jewels to add sparkle!

Stampin' Supplies:
Cardstock: Pumpkin Pie, Summer Starfruit
Designer Series Paper: Witch's Brew
Stamps: Tags 4 You
Ink: Jet Black StazOn
Punches: Bracket Label
Big Shot: Labels Thinlit
Other: Basic Rhinestone Jewels, Silver Stampin' Glitter, White Chalkboard Marker, Two-Way Glue Pen

Monday, October 7, 2013

Halloween Bash Swap

Hi Stampers!

Halloween is just around the corner and I have a spooky card to share with you.  This card is one I made for a swap I participated in on Stampin' Connection - the exclusive Stampin' Up! demo online community.  It's just one of the many benefits of being a demonstrator!


My absolute favorite thing about the Halloween Bash stamp set is that it can be used with a whole bunch of punches!  The coordination makes designing your cards so so so easy!


Here is another version of the card that I made.  Instead of layering the Witch's Brew DSP on Basic Black card stock, on this card, I layered some of the Witch's Brewn Washi tape on it.


Stampin' Supplies:
Card Stock: Wild Wasabi, Basic Black, Pumpkin Pie, Whisper White
Designer Series Paper: Witch's Brew
Stamps: Halloween Bash
Ink: Wild Wasabi, Jet Black StazOn
Punches: Decorative Label, Scallop Oval, Large Oval
Big Shot: Square Lattice Embossing Folder, Apothecary Accents Framelits
Embellishments: Witch's Brew Washi Tape, Large Rhinestones, Orange Sharpie

Friday, October 4, 2013

By The Tide Class IV

Hi Stampers!

Today I have one last card from the By The Tide class to share with you.  This card was also cased from Create with Connie and Mary but I changed up the color scheme to feature some of the new In Colors.  I think Sahara Sand, Coastal Cabana, and Pistachio Pudding is a very beachy color combo.


Here is a close up of the focal image.  The Vintage Faceted Button was given a little more glitz by adding a Basic Rhinestone to the center.


I love how delicate the coral image in this set is.  It's the perfect accent to decorate the interior of the card.


Here's the card with its coordinating envelope.


Stampin' Supplies:
Card Stock: Baked Brown Sugar, Pistachio Pudding, Coastal Cabana, Sahara Sand, Whisper White
Designer Series Paper: 2013-2015 In Color Stack
Stamps: By The Tide
Ink: Baked Brown Sugar, Coastal Cabana
Big Shot: Ovals Framelits
Punches: 1" circle
Embellishments: Vintage Facted Buttons, Basic Rhinestone Jewels

Wednesday, October 2, 2013

By The Tide Class III

Hi Stampers,

Today I have the third card from my By The Tide Class to share with you.  This is another card that I saw on Create with Connie and Mary.  I love the window technique on this card.  You can make windows on your card so easily by using your Framelits.  

The slightly different shades of the seashells was done by inking up the stamp once and staming it on the cardstock two times.


I decorated the interior by adding in a bunch of friendly seahorses!


I also used the seahorses to decorate the envelope.  Don't you love it when everything matches???


Stampin' Supplies:
Card Stock: Old Olive, Canjun Craze, Whisper White
Stamps: By The Tide
Ink: Early Espresso, Crumb Cake, Midnight Muse
Big Shot: Ovals Collection Framelits
Other: Early Espresso 1/4" Stitched Grosgrain Ribbon, Naturals Designer Buttons, Early Espresso Bakers Twine