Hi Stampers!
How has your week been? I've been busy, busy, busy! I'm waiting for my Holiday catalog pre-order to arrive! It won't be delivered until Monday. Wah! In the mean time, I have been playing with a lot of the sneak peek stamp sets I already have and will be posting some samples for you soon.
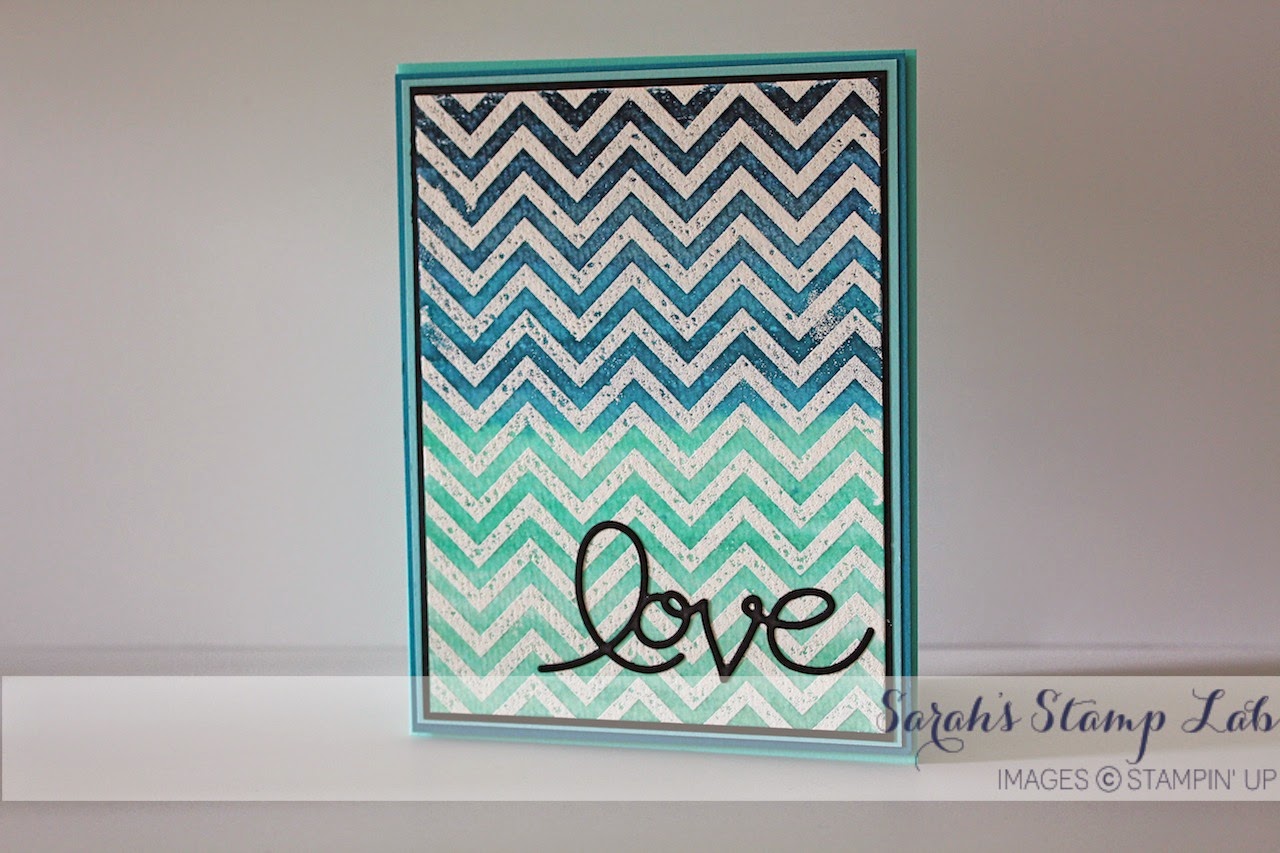
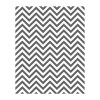
Today's card was inspired by what I learned on Day 1 of the Stretch Your Stamps 2 class over at Online Card Classes. The first lesson was all about ways to use your background stamps. I'll be honest, I don't have many background stamps - only 2 in fact! Today I'm showing you what I did with the Positively Chevron background stamp.
I took the background stamp and inked up different areas of it with four different shades of pink/magenta. I always ink with the lightest color first! Then lightly sprayed the stamp with some water using my spritzer. I layed the piece of watercolor paper down on top of the stamp and pressed firmly to transfer the color. I like the effect that it has and also that there are areas where the color didn't transfer so well. I think it makes it look very unique.
I took the stamped water color paper and trimmed off a piece about 1.75" inches wide to adhere to the card front.

Then I used the Bitty Butterfly punch to punch out several different butterflies. I added them to the card with the darkest ones on bottom and getting gradually lighter as we move up. By only putting adhesive in the middle you can bend up the wings to give them more dimension.

Here's a close up of the watercolor strip. I just love how splotchy the spritzed ink looks!
Do you see the "believe" sentiment? Does that look new to you? Well that's because it is! It's from and upcoming stamp set called Good Greetings. That set will be a hostess special so stay tuned for news on it! (You will me using it on a TON of cards because it has sooooo many great sentiments and I love the font.) Then I highlighted the sentiment with a strip of rhinestones to finish the card off.
I hope you like the card. I always love your comments!


Table by StampinBuddy. Try it FREE.


August's Class on the Go - Work of Art
The Work of Art stamp set (see page 165 of the 2014-2015 Annual Catalog) combines many different graphic elements to create your own works of art. With this kit you will see just how versatile this set can be! In this Class on the Go kit, you will be creating 4 cards (pictured below). I will show you how to create cards featuring the basic images in the set, as well as showing you some "outside of the box" ideas. I love finding new, and unique, ways to use my stamp sets!
Inks used:Lost Lagoon, So Saffron, Calypso Coral, Pool Party, Early Espresso, Pear Pizzazz, Blushing Bride, Hello Honey, Blackberry Bliss, Mossy Meadow, Jet Black Staz On
Kit includes:
Work of Art Stamp Set (please specify clear or wood mount)
All supplies needed to create the four cards shown plus envelopes
A PDF Instruction Sheet emailed to you with detailed step by step instructions, measurements, and even access to my first ever stamping video!
Ordering Options:
Class on the Go Kit with Wood Mount Stamps: $45
Class on the Go Kit with Clear Mount Stamps: $35
Class add on: Dazzling Diamonds and 2-Way Glue Pen $9.45
Shipping: $5.60 for Priority Mail
Pre-paid Registration is Due by 5:00PM Friday August 22nd
Contact me by email to register with your name, address, phone number and what class options you would like. I will respond with a total. Local customers may pay by cash or check. If you are not local, I will send you a Paypal Invoice which you can use to pay with your credit or debit card.
Kits will be ready for pick up/ shipped by Friday, September 5th.