Showing posts with label CAS. Show all posts

Wednesday, December 14, 2016

An Unexpected Result

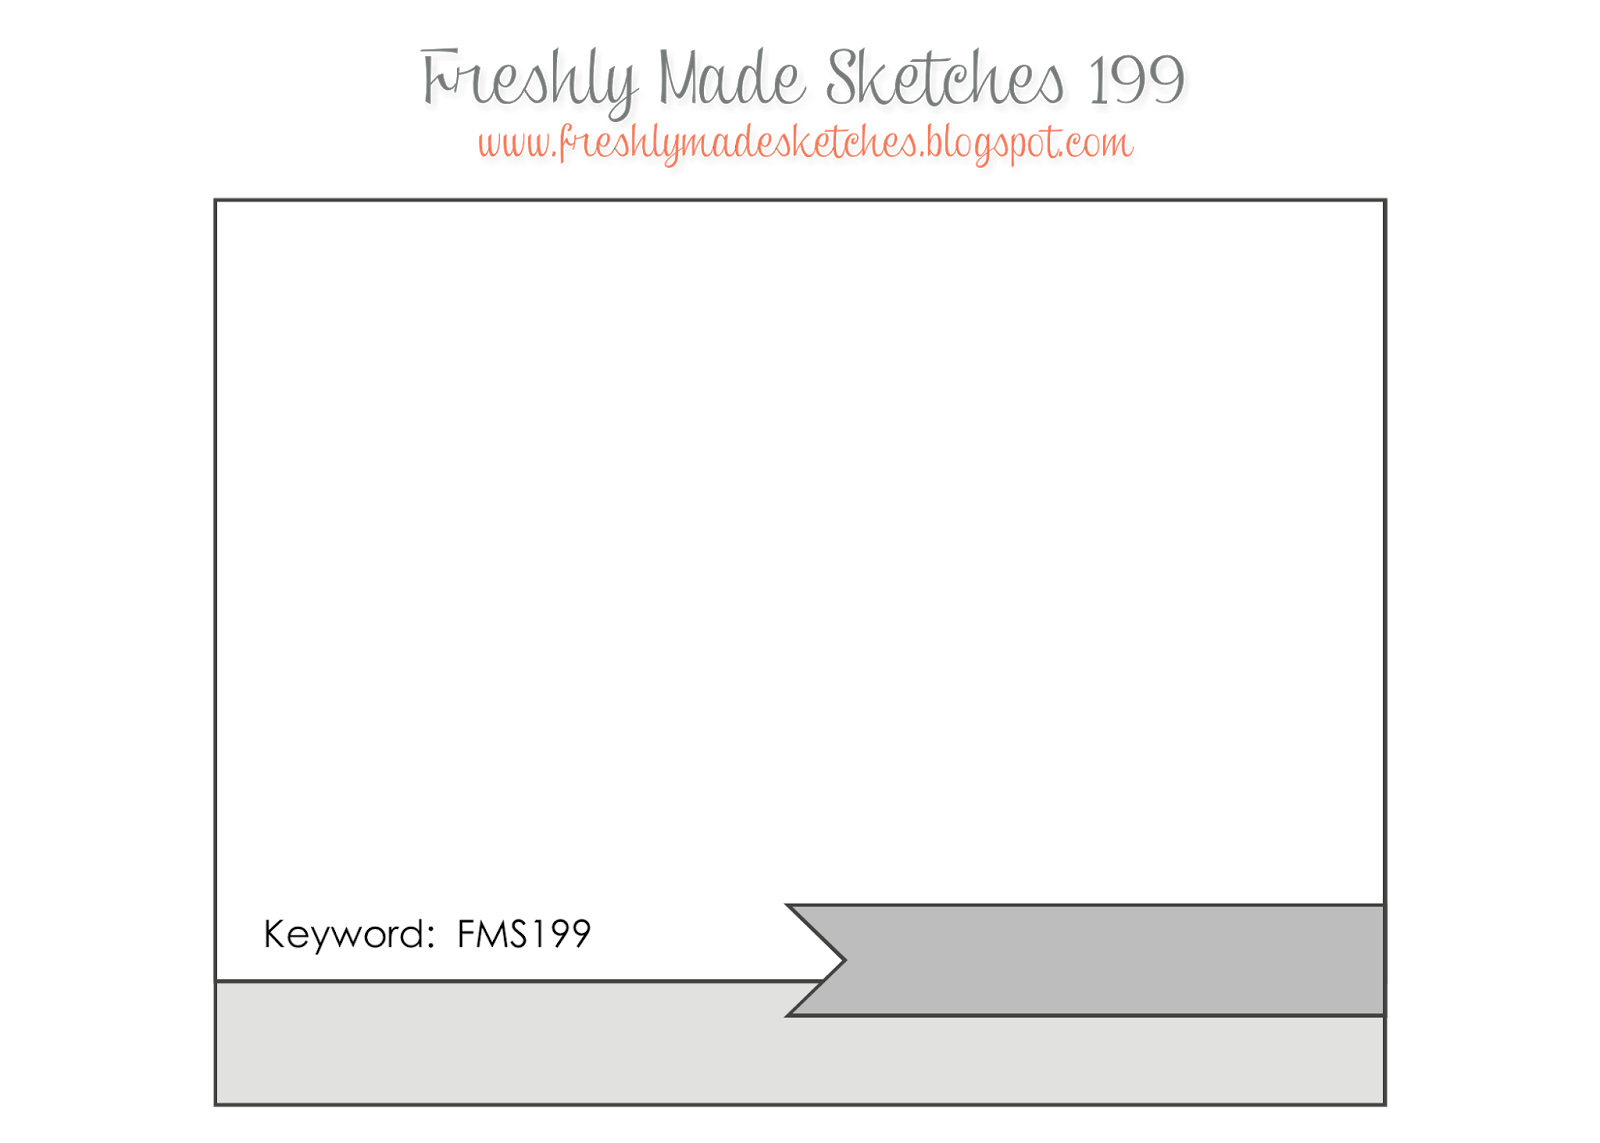
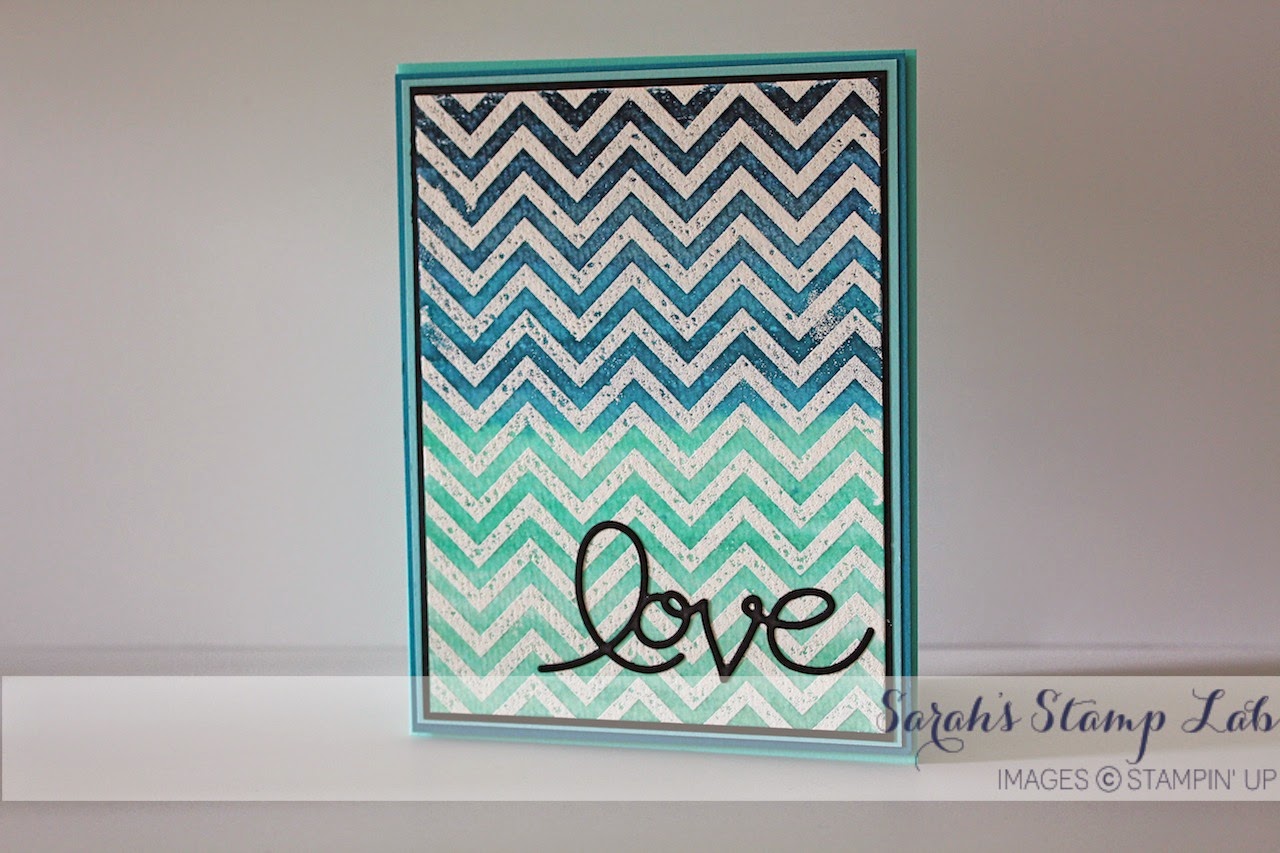
There are days when I sit down in my craft room and I have this great idea in my head.  I pull out all of the supplies I know I'm going to use and I settle in to stamping.  Then halfway through the project I hit a huge road block.  The idea in my head just doesn't translate to the project sitting in front of me.  Does this ever happen to you?  

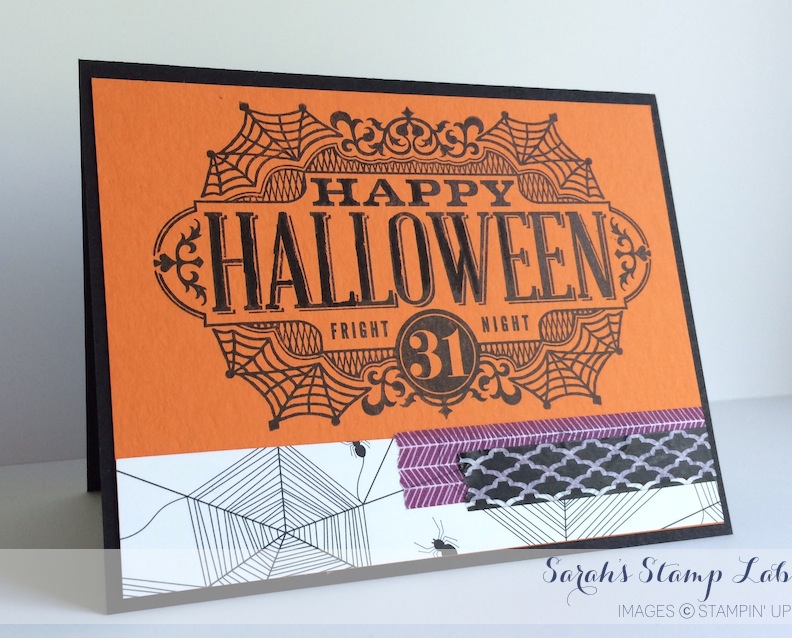
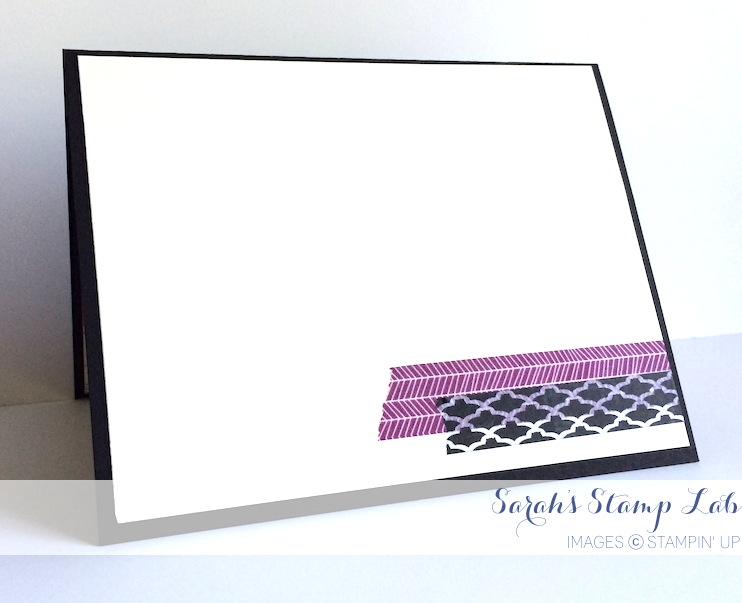
For this card, I got the card base, Basic Black and DSP layers down and then....nothing.  The idea for the focal point of the card just wasn't working.  Sometimes when this happens, I find that the best thing to do is walk away.  Sure, I could get frustrated.  Maybe I could get some short term satisfaction over ripping the card to shreds in a mini temper tantrum, but later I would regret that decision.

I like to let things marinate.

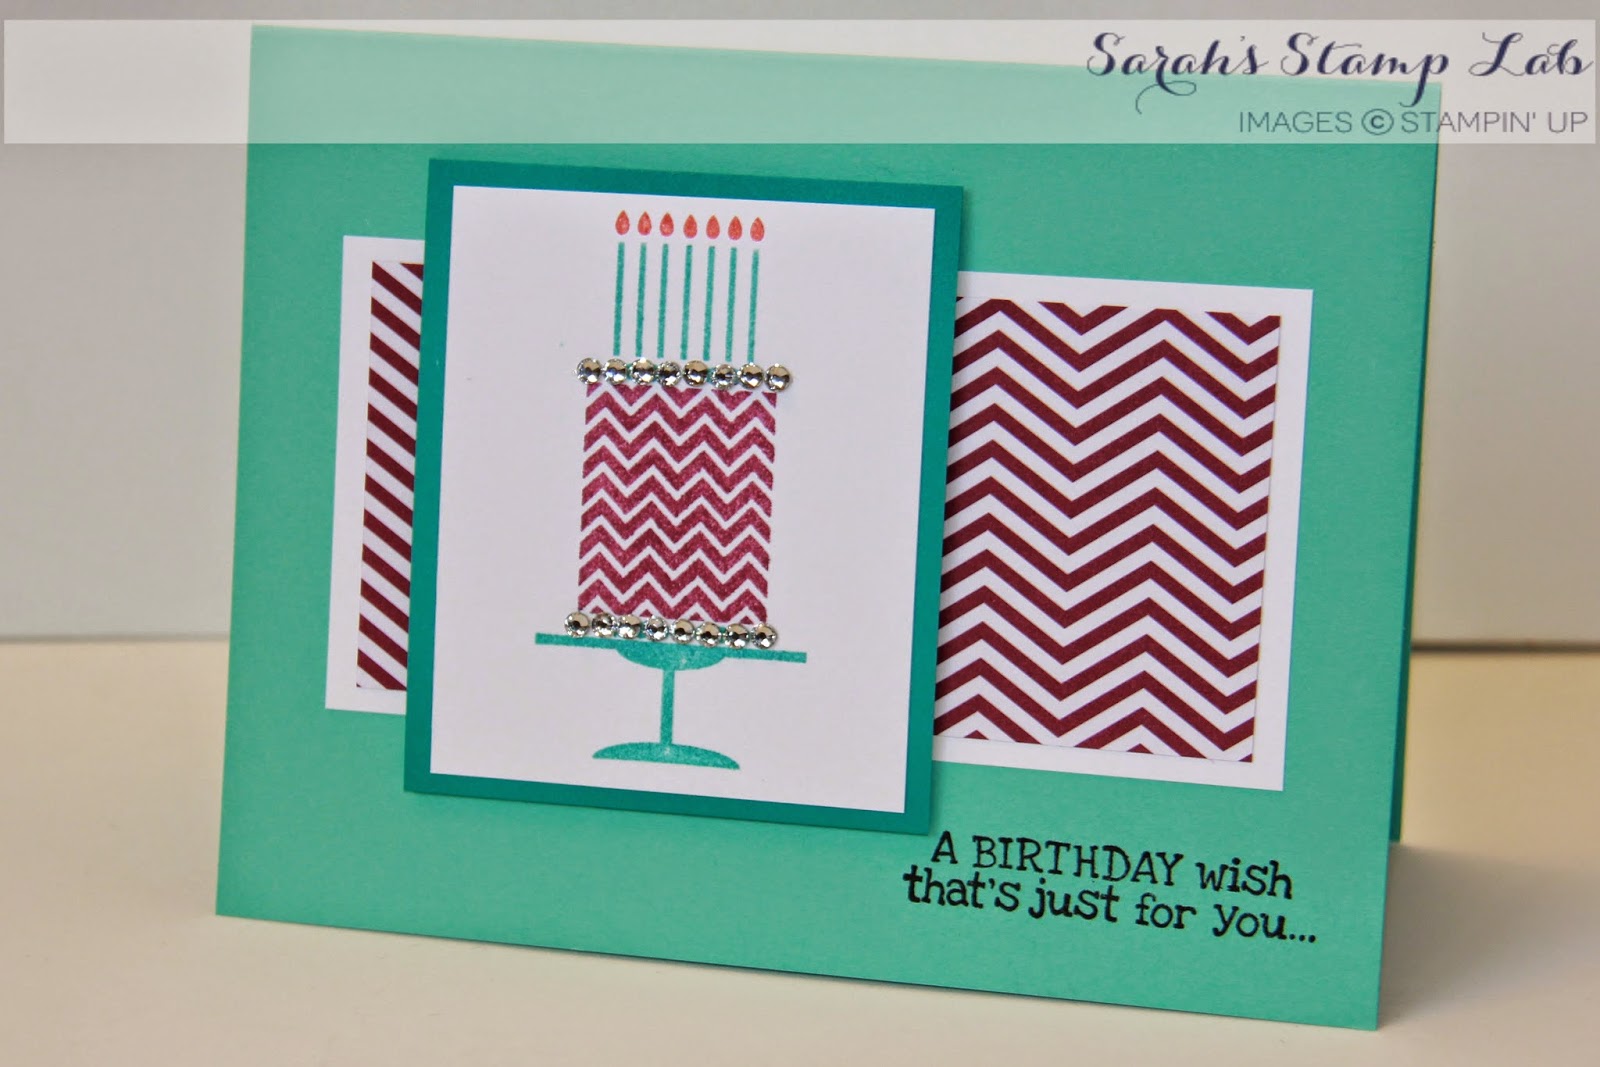
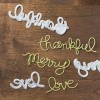
By giving my brain some time to process the idea, I came to the realization that the direction I was taking the card in was wrong.  So instead, I went back to my clean and simple style of stamping.  I pulled out the Stitched with Cheer stamp set because I knew that the images would coordinate beautifully with the DSP I had chosen.  This card is just so easy to make, and I absolutely love the end result: classy and simple!  Some two step stamping, and overlapping the "Holly" in the sentiment with the actual holly image gave me the design harmony I was craving!  


Hostess Code for December 1-31, 2016 - Q2N74DT4   
If you place an order with me during the month of December, use the code Q2N74DT4, and I will send you a free gift! If you place an order over $150 (before tax and shipping), do not use the code - you qualify for Stampin' Rewards and you will still get the free gift from me! The hostess code will close out on Dec. 31st, 2016.  Free gifts will be sent out during the first 2 weeks of January 2017.

Sunday, August 16, 2015

Freshly Made Sketches #199

Hi Stampers!

Today I have a sneak peek at a bunch of products from the brand new Stampin' Up! 2015 Holiday Catalog!  I love being able to pre-order the holiday products so that I can get a head start on all of my holiday crafting.  

I took some inspiration from the Freshly Made Sketches challenge blog.  Here's the sketch that they posted for this week.


Here's my take on the sketch.  I wanted to use a bunch of the new Halloween themed products from Stampin' Up!  I used the new Witches' Night stamp set.  It's photopolymer set that coordinates with a brand new home decor project kit, but it is also a great stand alone set for Halloween cards.  Look at how big the stamp is!  It's a perfect focal point for a card.  I used it alone on a piece of Tangelo Twist card stock here, but it coordinates with the Lots of Labels framelits from the annual catalog.  Do you also see the new Happy Haunting Designer Series Paper?  It's really cute!


I repeated the same washi tape flags on the inside of the card for more interest.  This is the new Happy Haunting Designer Washi Tape.  You know I love washi!  There is also a third roll of tape which is Tangelo Twist with little white stars on it.


Hope you enjoyed some of my sneak peeks at the new catalog today!  If you need some inspiration, make sure you check out the Freshly Made Sketches blog by clicking on the sketch above.  

Sneak Peek Items (available Sept. 1st, 2015):
Witches' Night Photopolymer Stamp Set
Happy Haunting Designer Series Paper
Happy Haunting Designer Washi Tape
Basic Black Archival Stampin' Pad


Built for Free Using: My Stampin Blog

Sunday, August 9, 2015

Watercolor Wings Gift Tag - Quick and Easy!

Hi Stampers!

Today I have a quick and easy project to share with you.  It's a fun little tag made with the Watercolor Wings stamp set.  This stamp set is a lot of fun to play with it.  You just keep adding layer upon layer of color until you get the effect you want.  Because they are photopolymer stamps, it's super easy to line up the images for perfect stamping every time.


I was able to create this tag in under 10 minutes!  You can just as easily create these tags yourself!  Any questions?  Let me know in the comments.  Thanks for looking!


Built for Free Using: My Stampin Blog

Wednesday, August 5, 2015

You Rock!

Hi Stampers!

For today's card I went a little out of my comfort zone.  I worked with a very bright, masculine color palette.  I really love the new Layered Letters Alphabet stamp set from the 2015-2016 Annual Stampin' Up! Catalog.  It's probably my favorite alpha set ever.  It's a lot of fun to play with.  Great for cards, but it's also a large enough size that it would look great on a scrapbook layout!  I'm definitely going to have to try that!


Do you have this alpha set?  Do you love it?  If not, what's your favorite alpha stamp set?  Let me know in the comments! :-)


Built for Free Using: My Stampin Blog

Thursday, August 14, 2014

Hello Honey In Color Sample Card

Hi Stampers!

Today I have a fun card to share with you!  Every year when the new In Colors are released, I run an In Color Club for my customers.  One of the perks of being in In Color Club is that I create a hand stamped card, featuring that month's color, and include it with their In Color stamping supplies.  It's my little thank you to my customers and I always hope that they gain inspiration from my cards.

For July the color was Hello Honey.  I always have mixed feelings about yellows.  I had the same reaction two years ago when we had Summer Starfruit as an In Color. My gut reaction is "how am I going to use this color?"  Then I start to pair it up with other colors and stamps and I really start to see how beautiful the color can be!  After two years of becoming more and more obsessed with Summer Starfruit, it was retired and I was so sad.  Now I'm having the same feelings about Hello Honey!  I'm slowly but surely warming up to this warm, golden shade of yellow that looks amazing paired with purples and greens.

Here is the card that I made for my customers.


I love how the Whisper White ribbon really pops against the Hello Honey background.


Aren't coordinating stamps and punches a wonderful thing?  It's so easy to get a perfect cut out of the stamped sentiment!  I also love how the embossed arrows are pointing in the same direction as the diagonal lines in the paper.  They coordinate but are not "matchy-matchy".


I made a ton of these cards!  I used different pieces of paper from the Moonlight paper stack.  It's one of my favorite products from the 2014-2015 Annual Catalog!  It was fun picking a paper pattern and then choosing a coordinating embossing folder.  Other embossing folders I used were the Honeycomb and the Decorative Dots folders.  Here are the first three:


And three more!


Table by StampinBuddy. Try it FREE.

August's Class on the Go - Work of Art

The Work of Art stamp set (see page 165 of the 2014-2015 Annual Catalog) combines many different graphic elements to create your own works of art.  With this kit you will see just how versatile this set can be!  In this Class on the Go kit, you will be creating 4 cards (pictured below).  I will show you how to create cards featuring the basic images in the set, as well as showing you some "outside of the box" ideas.  I love finding new, and unique, ways to use my stamp sets! 
Inks used:Lost Lagoon, So Saffron, Calypso Coral, Pool Party, Early Espresso, Pear Pizzazz, Blushing Bride, Hello Honey, Blackberry Bliss, Mossy Meadow, Jet Black Staz On

Kit includes:
Work of Art Stamp Set (please specify clear or wood mount)
All supplies needed to create the four cards shown plus envelopes
A PDF Instruction Sheet emailed to you with detailed step by step instructions, measurements, and even access to my first ever stamping video!

Ordering Options:
Class on the Go Kit with Wood Mount Stamps: $45
Class on the Go Kit with Clear Mount Stamps: $35
Class add on: Dazzling Diamonds and 2-Way Glue Pen $9.45
Shipping: $5.60 for Priority Mail
Pre-paid Registration is Due by 5:00PM Friday August 22nd
Contact me by email to register with your name, address, phone number and what class options you would like.  I will respond with a total.  Local customers may pay by cash or check.  If you are not local, I will send you a Paypal Invoice which you can use to pay with your credit or debit card.

Kits will be ready for pick up/ shipped by Friday, September 5th.

Wednesday, July 30, 2014

A birthday wish...

Hi Stampers!

Today I have a card that I made a while back but I still wanted to share it with you!  It's a fun (and easy) card that I made with the Birthday Cake a la carte stamp (retired). I adore this color combo.  I think it would also look fabulous in a combo of Hello Honey and Blackberry Bliss in case you want to CASE this card but switch it up a bit! I am in love with the chevrons on this stamp and how they coordinate with the chevron paper that is in the Brights paper stack!  Gah, it makes me giddy when everything matches so nicely!  Love that about Stampin' Up!  

See those rhinestones on the cake?  To keep them straight, I used the rhinestone strip that comes in the Basic Jewels Rhineston pack and just cut it down to the size that I needed.  Who has the time to perfectly line up all of those rhinestones?  No one!  I love that the work was already done for me.  


Every stamper has made tons of birthday cards.  Do you have one that you made and really love?  Let me know in the comments!


Table by StampinBuddy. Try it FREE.
August's Class on the Go - Work of Art

The Work of Art stamp set (see page 165 of the 2014-2015 Annual Catalog) combines many different graphic elements to create your own works of art.  With this kit you will see just how versatile this set can be!  In this Class on the Go kit, you will be creating 4 cards (pictured below).  I will show you how to create cards featuring the basic images in the set, as well as showing you some "outside of the box" ideas.  I love finding new, and unique, ways to use my stamp sets! 

Inline image 1
Inks used:Lost Lagoon, So Saffron, Calypso Coral, Pool Party, Early Espresso, Pear Pizzazz, Blushing Bride, Hello Honey, Blackberry Bliss, Mossy Meadow, Jet Black Staz On

Kit includes:
Work of Art Stamp Set (please specify clear or wood mount)
All supplies needed to create the four cards shown plus envelopes
A PDF Instruction Sheet emailed to you with detailed step by step instructions, measurements, and even access to my first ever stamping video!

Ordering Options:
Class on the Go Kit with Wood Mount Stamps: $45
Class on the Go Kit with Clear Mount Stamps: $35
Class add on: Dazzling Diamonds and 2-Way Glue Pen $9.45
Shipping: $5.60 for Priority Mail
Pre-paid Registration is Due by 5:00PM Friday August 22nd
Contact me by email to register with your name, address, phone number and what class options you would like.  I will respond with a total.  Local customers may pay by cash or check.  If you are not local, I will send you a Paypal Invoice which you can use to pay with your credit or debit card.

Kits will be ready for pick up/ shipped by Friday, September 5th.

Please feel free to contact me with any questions!!!

Saturday, July 5, 2014

Wonderful Words Challenge

Hi Stampers!

I'm a fan of reading the Moxie Fab World blog.  I have gotten a lot inspiration from their posts for my cards and scrapbook layouts.  They recently posted a challenge to use word dies in a project - the Wonderful Words Challenge.  Word dies are a hot new trend in the papercrafting world and I could not resist making a card for this challenge.

I decided to combine the word die with a new technique I am working on which is using more watercoloring in my projects.

To create this card front, first I used the Positively Chevron stamp to heat emboss the image on a sheet of watercolor paper.  I used white embossing powder to really make the image stand out.   Then I used ink refills and my aqua painter to create the ombre effect.  I pull out a piece of wax paper, and I add one drop of each ink refill I'm going to use to the paper to create a little pallet.  Using the Aquapainter, I pick up a little bit of the lightest color (Pool Party) and then just wash it over one end of the design.  Then I go to the next darkest color (Coastal Cabana) and repeat the process, overlapping the washes to get a blended look.  Then I did a wash of Island Indigo and finally a wash of Midnight Muse.  I really saturated the paper so I used my Heat Tool on setting 1 to dry it.  Then I used Tombow liquid glue to adhere the watercolor paper down to the first mat (Basic Black).  I did this just to make sure I had a secure bond between the papers in case the watercolor paper started to warp from being wet.  The rest of the card was assembled with Snail adhesive.  I used the Expression Thinlits to cut out the word "love" to add to the lower right corner.  When adhering these very thin words, I pull out my waxed paper again, make a drop of Tombow liquid glue and then I use a toothpick to put glue on the back of the word.  I have found this to be the least messy process!

My hubby loved getting this card for our anniversary!  It was masculine but the script word added just enough "softness" for  an anniversary card.

I hope this inspires you to try using word dies and watercoloring!  Any questions?  Just leave them in the comments below!

Stampin' Supplies: