Showing posts with label SU. Show all posts

Sunday, August 9, 2015

Watercolor Wings Gift Tag - Quick and Easy!

Hi Stampers!

Today I have a quick and easy project to share with you.  It's a fun little tag made with the Watercolor Wings stamp set.  This stamp set is a lot of fun to play with it.  You just keep adding layer upon layer of color until you get the effect you want.  Because they are photopolymer stamps, it's super easy to line up the images for perfect stamping every time.


I was able to create this tag in under 10 minutes!  You can just as easily create these tags yourself!  Any questions?  Let me know in the comments.  Thanks for looking!


Built for Free Using: My Stampin Blog

Saturday, July 25, 2015

Stampin' Up! Clearance Rack

Here's a look at all of the wonderful items that are currently available on Stampin' Up!'s Clearance Rack. Snatch up these deals before they are gone!
Built for Free Using: My Stampin Blog

Saturday, December 15, 2012

Holly Jolly Reindeer

Hello There Stampers!

Good morning!  This is my annual Christmas Cookie Baking Weekend, or as my husband calls it "Cookie Palooza!".  I wanted to post another cute Christmas card before I lock myself in the kitchen to make 7 batches of cookies today.  I'll be pooped by the end of it, but I know how much people look forward to getting a box of my cookies every year, so I don't mind all the baking one bit!  Maybe if I have time, I'll even try out the cookie stamps. :-) 

On to today's card!

We made this card at a recent Stampin' Up! party.  It's a super simple design and comes together quickly, but I love the end result!  The little bow of Gumball Green Sweater Trim just makes it toooo cute!

Stampin' Supplies:
Paper: Crumb Cake, Early Espresso, Very Vanilla
DSP: Orchard Harvest (Who says you can't use Autumn themed paper for Christmas!)
Stamps: No Peeking
Ink: Early Espresso, Real Red
Other: Gumball Green Sweater Trim

See you all again when I resurface from the baking!

Wednesday, December 12, 2012

Tutorial for Beginner Stampers: Putting Together Clear Mount Stamp Sets

Hi Stampers!  

I'm beginning to put together some tutorials together to help out both beginning stampers as well as more experienced stampers with basic how-tos and more advanced projects/techniques.  Today I am featuring a how-to on putting together clear mount stamp sets.

1. When you first open your stamp set, you will see two items: a sheet of your rubber stamps and a sheet of labels.  The first thing you want to do is separate all of the stamps from the rubber sheet.  Do not throw the sheet away, you will use it later.


2. Choose the first stamp to assemble.  Find that label on the label sheet and remove the white paper backing from that label.  Be careful, the label is sticky!


3. Remove the paper backing from the stamp.


4. Place the stamp, gray foam side down, on top of the adhesive label.  Apply light pressure to get the label to stick well to the stamp.  Make sure if it's a stamp with words that you are adhering the label in the correct orientation.


5. Gently peel the stamp with the label off of the label sheet.


6. Now you have a labeled stamp!  Repeat for the remaining stamps in the set.


7. Put the rubber sheet back into the stamp case.


8. As you label your stamps, place them in the case in their respective spots in the rubber sheet. This way you will know immediately if a stamp is missing and will hopefully save you from losing a stamp!


I hope this tutorial is helpful!  If you have any questions, don't hesitate to email me!


Sunday, December 9, 2012

Scentsational Seasons 3

Good morning Stampers!
It's Stamp a Stack day! Yaaaay!  I have five lovely ladies coming to my house today to stamp 15 Christmas cards.  The Stamp a Stacks are always a really popular event that I host.  I will be hosting another one in the new year that's themed.  Stay tuned for more details on that!  Interested in attending one of my classes?  You can click on the Class Schedule tab above for an up to date listing of classes.  If you want ADVANCED notice of classes, you can sign up for my newsletter.  Click this link and then click on "Request My Newsletter".  

Now on to today's project!!  Here's a sweet little 3D card.


I made the Christmas tree pop up by stamping and die cutting three of the tree images.  Then you score and fold down the middle and glue together.  It's super easy to do.  One thing I have noticed with the Holiday Collection framelits is that the Christmas tree is not perfectly symmetrical.  I did a little minor trimming and then later decided to put a little glitter on the edges (not shown here) to hide the imperfections.


Stampin' Supplies:
Cardstock: Whisper White, Primrose Petals, Real Red, Snow Festival Designer Series Paper
Ink: Garden Green, Primrose Petals
Stamps: Scentsational Season, Greetings of the Season
Other: Holiday Collection Framelits, Decorative Label Punch, 1/8" Mini Brads in Silver, Dazzling Diamonds, Dimensionals

Wednesday, December 5, 2012

Scentsational Season Cocoa

Good Morning Stampers! 
It's now the first week of December and I am ready to start posting some holiday projects!  For the next few posts I am going to be featuring one of my favorite sets from the Holiday catalog this year: Scentsational Season!  I just love all of the cute images and the fact that they can be cut out with the Big Shot using the Holiday collection of framelits.  Today I am showing a favor that I made for a class I held last month. It's an adorable (and easy to make) cocoa packet.  Wouldn't these make great stocking stuffers or a little something extra to attach to a gift???

Here's an image of the cocoa packet sliding out of the holder.  The trick is to use a long enough piece of ribbon to hold the packet like a sling.


Stampin' Supplies:
Cardstock: Whisper White, Island Indigo, Gumball Green
DSP: Snow Festival
Ink: Gumball Green, Illuminate
Framelits: Holiday Collection, Labels Collection
Other: Dimensionals, Gumball Green 3/8" Stitched Satin Ribbon

Sunday, November 11, 2012

Halloween Wrap Up

Hi Stampers!

I know it has been a while.  I was without power and Internet for a little over a week due to Hurricane Sandy.  Thankfully, we are all safe and have no damage to our property, which is fortunate considering how close we are to areas that were really devastated.  If anyone is looking for a place to make donations/volunteer in the NJ Bayshore area, please contact me and I can give you some information.

So since there was a delay, I was unable to post all of my remaining Halloween projects.  Below you can find the remaining projects from the Halloween season.  Soon I will begin posting some Fall and Christmas projects, so stay tuned for many new ideas for your holiday crafting!

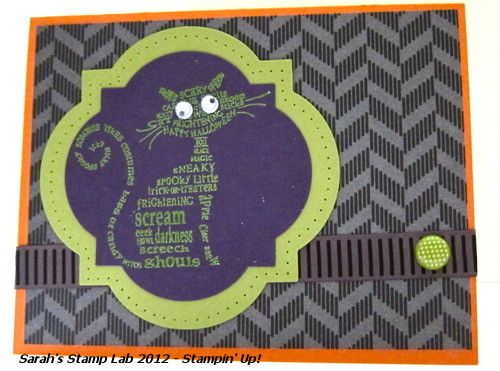
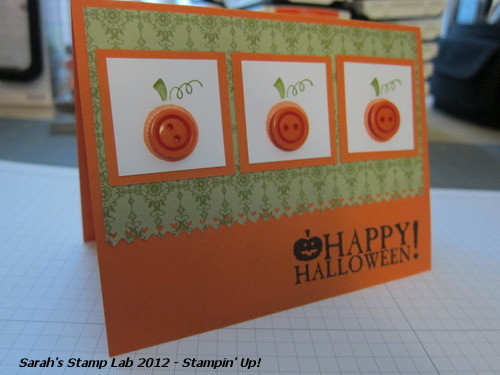
Here is one of the cards that I sent out to friends and family for Halloween.  It's a variation on an earlier card I made.  To see the first card, click here.

Stampin' Supplies:
Stamps: Frightening Feline
Ink: Versamark
Cardstock/Paper: Pumpkin Pie, Lucky Limeade, Elegant Eggplant, Howlstooth and Scaringbone Designer Series Paper
Other: 1/2" Striped Satin Ribbon, Window Frames Framelits, Festive Paper Piercing Pack, Piercing Tool, Piercing Mat, Heat Tool, Gumball Green Embossing Powder, Googlies, Dimensionals, 3/8" Designer Printed Brads

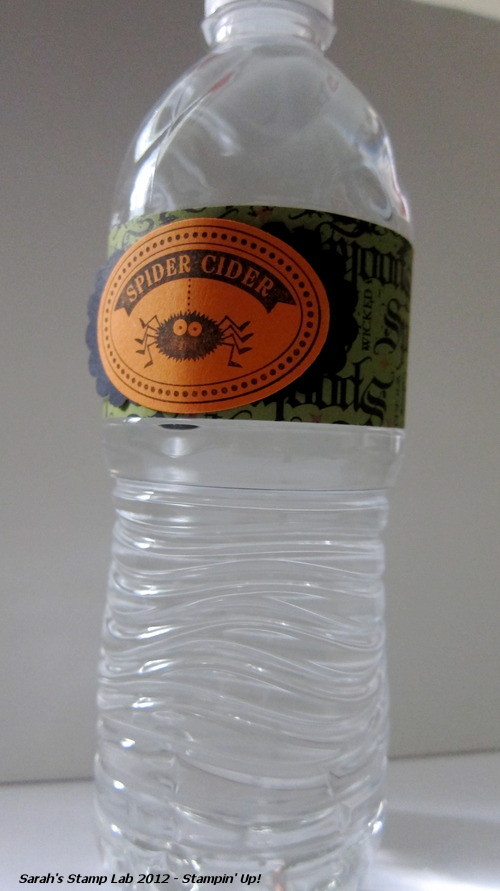
Up next are some bottle wrappers I had originally made for some customers who were attending a Halloween class.  This project features some of last year's Halloween themed Designer Series Paper.  It can be found on the Clearance Rack.


Stampin' Supplies:
Stamps: Monster Munchies
Paper: Wicked Fun Specialty Designer Series Paper, Pumpkin Pie, Basic Black
Ink: Basic Black
Other: 1 1/4" Scallop Circle Punch, Extra-Large Oval Punch, Dimensionals

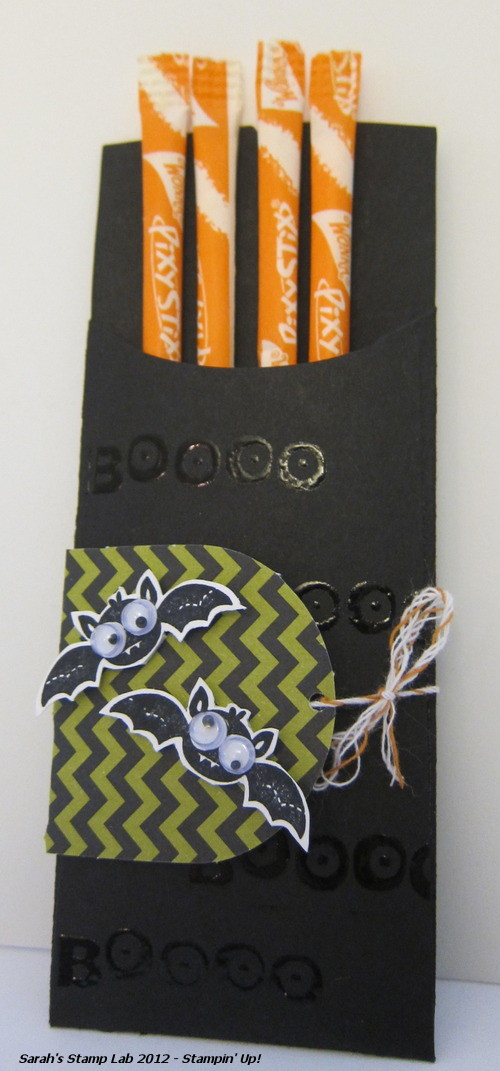
The last project I am going to be featuring today is the favor that I made for those who attended my Googly Ghouls card class.  My fellow demonstrators may recognize this as one of the projects featured in our demonstrator magazine, Stampin' Success.  It's one of the best perks of being a demonstrator.  If you would like to see what the magazine is like, click here for a taste of what the articles are!  If you are interested in becoming a demonstrator, email me!

Stampin' Supplies:
Stamps: Googly Ghouls
Ink: Versamark, Jet Black StazOn
Paper: Basic Black, Whisper White
Other: Ghoulish Googlies Designer Kit, Dimensionals, Black Embossing Powder, Heat Tool, Petite Pocket Bigz XL die

That's all I have for today.  I hope you enjoyed the last few spooky projects I have for you!  Now it's time to bid the Ghouls farewell and move on to some new holiday projects!

Be sure to check out my Promotions tab above for the newest promos from Stampin' Up!  Stay tuned for a new 2013 Class schedule!!!


Thursday, October 11, 2012

Chock Full of Cheer Day 5

Hi Stampers!

Today is the last day of my Chock Full of Cheer projects!  Are you sad?  Don't be, I'll have plenty more holiday projects to show as the weeks go by.  Today's card was easy and fun to make.  I love the idea of using the negative of a punch to showcase Stampin' Up's beautiful Designer Series Paper.

The card's interior...


Stampin' Supplies:

·      5 ¼” x 4” (2) Whisper White Cardstock
·      8 ½” x 5 ½” Cherry Cobbler Cardstock
·      3” x 3” Be of Good Cheer Designer Series Paper
·      Cherry Cobbler and Gumball Green Ink Pads
·      Ornament punch and Scallop Trim Border Punch
·      Large Basic Rhinestone
·      Merry Christmas and polka dot strip from Chock-Full of Cheer
·      Internal sentiment from More Merry Messages
·      Adhesive, Sponge Dauber, and Scissors
·      Whisper White A2 envelope

Friday, October 5, 2012

Chock Full of Cheer Day 2

Hi Stampers!

Happy Friday! Are you happy the weekend is here???  I am!  It's been a busy week, and an even busier weekend is ahead.  Tonight we are going to see Robert Irvine (of Restaurant Impossible fame) and tomorrow is our first Rutgers Football game of the year!  Very exciting!!!  I'm still hoping to find some time to stamp.  You should find some time as well!  After all, this Saturday is World Card Making Day!!!!  I think, as loyal stampers, that it is only fair that we celebrate! :-)

Alright, on to today's project!  This is the little favor I made for those who attended my Chock Full of Cheer class a little while back.  I wanted to show them how easy it is to make your own gift tags using that set!  

Then I packaged them in a small cellophane bag and tied it closed with some velvet ribbon (retired item).  How cute!!!


Stampin' Supplies:
Card Stock: Whisper White, Gumball Green
Ink: Real Read, Gumball Green
Punches: Decorative Label, Ornament, Mitten Builder, 1/16" circle, and 1 3/4" Circle
Basic Pearls
Early Espresso Bakers Twine

Check out Day 1 here!

Tuesday, September 25, 2012

Embellished Events Day 4

Hi Stampers!!!

Welcome back to my final day of Embellished Events sample.  Even though it's the last day of class samples, I'm sure this set will be pulled out again in the future.  It's a great one to use for stamp a stacks!  This card is another case, this time by a card made originally by Jacque Craig.  My fellow demos are so inspiring!


Stampin' Supplies:

5 1/2" x 8 1/2", 3 3/4" x 2 1/4", and 1/2" x 4 1/4" Tangerine Tango Cardstock
4" x 5 1/4" and scrap for punching Tempting Turquoise Cardstock
Top Note and 2" x 3 1/2" Whisper White Cardstock
2 1/2" x 3 3/4" (2) Summer Smooches Designer Series Paper
4" Daffodil Delight 1/4" Stitched Grosgrain Ribbon
Rich Razzleberry and Old Olive Stampin' Write Markers
StazOn Black and Tempting Turquoise Stamp Pads
Basic Pearls
Ornament Punch
Perfect Polka Dots Embossing Folder
Flowers and "thinking of you" stamp from Embellished Events
Adhesive, Glue Dots, Sponge Dauber, Dimensionals, and Scissors
Whisper White A2 envelope

Other days of the Embellished Events samples:

Make sure you check out my Class Schedule tab above for the most current list of upcoming classes!

Wednesday, September 19, 2012

Embellished Events Day 1

Hi Stampers!

I'm back with the cards that we made at my Embellished Events class!  Today's card is a case of one that I saw made by Jennie Maier.  I took her concept and stepped it up!  I really love this color combo and think I need to use it more often.  I'm thinking it would be a great combo for a non-traditional Christmas card.  What do you think?


Stampin' Supplies:
5 1/2" x 8 1/2" Old Olive Cardstock
3 3/4" x 1 1/4" (2) and 2 1/4" x 3 1/4" Midnight Muse Cardstock
2" x 3" Whisper White Cardstock
1" x 3 1/2" (2) Polka Dot Parade Designer Series Paper
Old Olive, Rich Razzleberry, and Midnight Muse Stampin' Write Markers
Basic Rhinestones
Cake and "Celebrate" stamps from Embellished Events
Adhesive, Dimensionals, and Scissors
Whisper White A2 envelope

Promotion!!!!
Don't forget the Back to School promotion is currently going on!  Free ribbon with every $40 of merchandise (excl. tax and shipping).  Check out more details here!


Upcoming Classes....

There is still time to sign up for my Friendship Preserves class!


Wednesday, September 12, 2012

Button Buddies Day 4

Hi Stampers!

Welcome to the final day of my Button Buddies class samples.  Today's card is sooo cute!  I made this card with more masculine colors but you can easily change it up to be more feminine or brightly colored for kids! I love how you can bend the Bitty Banners to give a little more dimension to your card.

Stampin' Supplies:

·       5 ½” x 8 1/2” Marina Mist Cardstock
·       2 ½” x 3 3/4” Tangerine Tango Cardstock
·       2 ¼” x 3 ½” and 1” x 3” Whisper White Cardstock
·       1” x 4” Old Olive Cardstock
·       1” x 1 ½” Midnight Muse Cardstock
·       Pretty in Pink and Tangerine Tango Stamp Pads
·       Basic Black Stampin’ Write marker
·       Old Olive Designer Button
·       Piggy stamp from Button Buddies
·       Happy Birthday stamp from Itty Bitty Banners
·       Scallop Edge Border Punch
·       Bitty Banners Framelits
·       2 1/8” Mini Brads
·       Adhesive, Glue Dots, Dimensionals, paper piercing tool, and Scissors
·       Whisper White A2 envelope

To see the other samples from this class, click the links below:

Sneak Peek time!!!

This Sunday I am hosting my first in a series of monthly Christmas card classes!  This month the focus is on the Chock-Full of Cheer stamp set.  I have loved this set since I first saw it released in the 2012-2013 Idea Book and Catalog.  Check out page 40 of the catalog for the entire product suite!


FREE STUFF ALERT!!!


Check out my promotions page to find out how you can get a free spool of the beautiful new 3/8" Stitched Satin In Color ribbon.  This deal is not to be missed!!!!

Monday, September 10, 2012

Button Buddies Day 3

Hi Stampers!  Welcome to day 3 of my Button Buddies class samples.  It was a busy weekend so I didn't get as much accomplished in the way of setting up blog posts.  Hopefully, I will have some time this week because I want to post some sneak peeks at the upcoming Chock-Full of Cheer class!  If you are in the Central NJ area and are interested in taking this class, email me at sarah@demmeni.org.

And now on to the card!

I went for a very simple layout on this one because we are using three pretty big buttons on it.  I'm not sure it this one can be mailed with a regular postage stamp.  You may have to put a $0.65 stamp on it.  Or just visit the person and hand it directly to them!

Stampin' Supplies:


·       5 ½” x 8 1/2” and 1 5/8” x 1 5/8” (3) Pumpkin Pie Cardstock
·       1 3/8” x 1 3/8” (3) Whisper White Cardstock
·       3” x 5 ¼” Old Olive Designer Series Paper
·       Pumpkin Pie and Old Olive Stampin’ Write Markers
·       Versamark
·       Heat tool
·       3 Pumpkin Pie Designer Buttons
·       Pumpkin stamp from Button Buddies
·       Happy Halloween stamp from Seasonal Sayings
·       Pinking Hearts Edge Border Punch (retired!  Substitute in the Finishing Touches Edgelit)
·       Early Espresso Embossing Powder
·       Adhesive, Glue Dots
·       Whisper White A2 envelope


Here are the other days of the Button Buddies class, in case you missed them!
Don't forget about the Back to Spool promotion! Click here for more details!

t